Wednesday, March 27, 2013

Clean Eating Skillet Baked Ziti with Sausage

Makes 10 servings, about 1 cup each
I have made this once a week for the past 4 weeks. It is a new family favorite :) We have been in Japan for almost 6 months now. The time has just flown by and we are loving this wonderful experience. The kids and I have gotten really involved with modeling since we have been here which means that we spend a few days a week in Tokyo for jobs or auditions. I have had to rely a LOT on my freezer stash and quick-but-healthy throw together meals like this one for the nights that we are getting home from the train station right at dinner time. 

I whipped this up one night when Matt was gone, we had been in the city all day, and I just wanted a nice, home-cooked meal. Whenever my sister, Anthea (hi, Anthea!!), comes to visit me she always makes me baked ziti. She just throws it together but if you have been following my blog for any length of time you know I am incapable of cooking ANYTHING without a recipe. I was googling baked ziti recipes and came across a few that were started on the stove and finished in the oven and I loved how much faster it was so I pieced this together from a few different sources. It is also a super great way to use up wilted spinach that you don't want to eat in a salad :)

Technically this is rotini, not ziti, but the commissary doesn't carry whole wheat ziti
so this was the best I could do ;)
Ingredients:
  • 4 big handfuls spinach
  • 2 cloves garlic, minced (1 tsp)
  • 12 oz all natural, nitrate free sausage, sliced into medallions (I use Saag's Naturals Chicken Apple)
  • 28 oz can no salt added crushed tomatoes, undrained
  • 1/2 tsp salt
  • 1 Tbsp dried basil
  • 1/2 Tbsp dried oregano
  • 3 cups water
  • 12 oz whole wheat pasta
  • 1/3 cup neufchatel (or reduced fat cream cheese) OR 1/2 cup part skim ricotta cheese
  • 2 Tbsp grated parmesan cheese
  • 1 cup part skim shredded mozzarella
ONE: In a large oven proof skillet, cook the spinach and garlic over medium heat until the spinach is wilted, about 5 minutes. Add the sliced sausage and cook until lightly browned, about 5 minutes.

TWO: Pour in the crushed tomatoes with juices, salt, basil, oregano, and water. Bring to a simmer.

THREE: Preheat oven to 475. Stir the uncooked pasta into the tomato sausage mixture in the skillet, cover, and reduce heat to low. Cook covered until pasta is al dente, about 12-15 minutes, stirring occasionally. 

FOUR: Remove from heat and stir in the cream cheese/ricotta cheese and parmesan. Sprinkle the mozzarella cheese over the top and put the skillet into the preheated oven. Bake 10 minutes until cheese on top is melted and lightly browned.

NOTE: If you don't have an oven-proof skillet, you could certainly do the stove top part in a sauce pan or regular skillet and then dump it all into a casserole dish before sprinkling on the mozzarella. I just like using the oven proof skillet because then I only have one pan to wash.

Freeze leftovers in 1 cup portions using the medium/large portions method to feed your freezer stash.

Nutrition Info:
Per 1 cup serving made with Neufchatel- 243 Calories (48 Calories from Fat), 5g Fat, 2.5g Saturated Fat, 35mg Cholesterol, 384mg Sodium, 32g Carbohydrates, 5g Dietary Fiber, 3g Sugars, 16g Protein, 34% DV VitA, 20% DV VitC, 15% DV Calcium, 13% DV Iron

Per 1 cup serving made with Ricotta Cheese- 232 Calories (41 Calories from Fat), 5g Fat, 2g Saturated Fat, 32mg Cholesterol, 330mg Sodium, 32.5g Total Carbohydrates, 5g Dietary Fiber, 3g Sugars, 15g Protein, 34% DV VitA, 20% DV VitC, 9% DV Calcium, 14% DV Iron

Cook spinach and garlic until spinach wilts
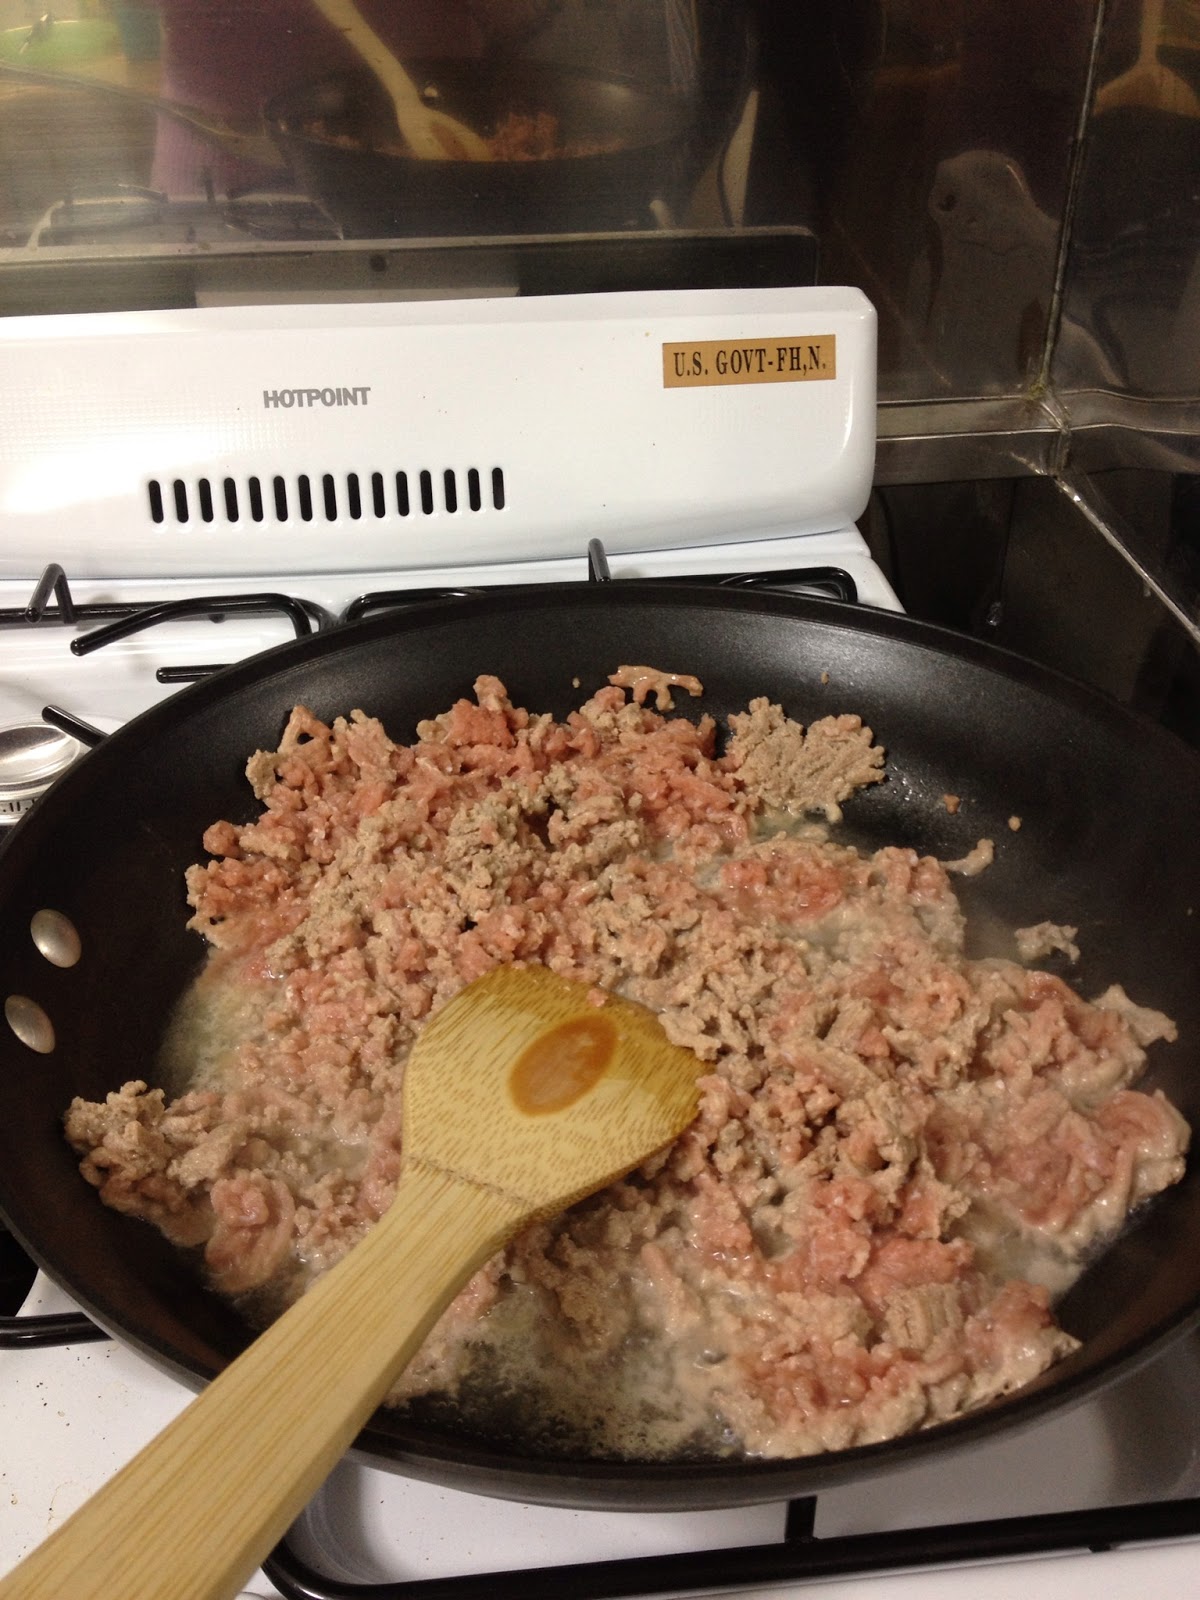
Add in sliced sausage and cook until lightly browned
Stir in crushed tomatoes, seasonings, and water. 
Add in pasta, cover, reduce heat to low, and cook 12-15 mins until al dente 
Stir in ricotta/cream cheese and parmesan and sprinkle top with mozzarella.
Bake at 475 until cheese on top is melted and lightly browned.
:)

Tuesday, March 5, 2013

Clean Eating Butternut Squash and Lentil Soup with Coconut and Cilantro

Makes 9 servings, about 1 cup each
I LOVED this soup. But I might be biased because butternut squash and coconut are two of my favorite foods. For me this was the perfect mix of slightly sweet squash and creamy coconut with a hint of cumin. I will admit that Matt and the boys weren't huge fans (meaning they ate it but there was some whining) but they all despise butternut squash so I wasn't super surprised. But that's okay, all the more for me and the baby (her opinion doesn't really count yet because at this point she eats anything we put in her mouth lol). This was fast to make, froze really well, and made me happy as I ate it for lunch all week when it was chilly outside. I did not add any salt to it so, if you are new to clean eating (or just like your soup a bit salty), then you might want to throw some in. At first glance it may seem like this dish is high in saturated fat but it's mainly from the coconut milk which is, believe it or not, good for you. Read more about it HERE.


Liadan and I modeling how delicious this soup is!
Okay, we were really modeling the Thermos product. But the reason she opened her mouth wide with that happy look on her face so they could get this great shot was because she was eating this soup so I think that still counts ;)
Ingredients:
  • 1 medium onion, chopped (about 1 cup)
  • 1 large carrot, chopped (about 1 cup)
  • 2 cloves garlic, minced
  • 1 cup of lentils (I used green but any kind is fine)
  • 4 cups broth (I used chicken but vegetable would be fine too)
  • 1 can coconut milk
  • 1 tsp cumin
  • 1/2 tsp dry mustard
  • 2 lbs butternut squash, peeled and chopped (2 1/2 - 3 cups)
  • 1/2 cup minced fresh cilantro plus extra for garnish
CROCKPOT INSTRUCTIONS: Throw everything into the crockpot, cover, and cook on high 4-5 hours or low 7-8 hours or until lentils and veggies are tender.

It makes me so happy to dump a bunch of stuff into the crockpot
and then have it be delicious soup in the evening :)
STOVETOP INSTRUCTIONS: Heat 1/2 Tbsp olive oil in a large soup pot and sauté the onion, carrots and garlic for about 5 minutes or until the onions are tender. Add lentils, broth, coconut milk, cumin, mustard, squash, and cilantro. Bring to a boil then reduce heat and let simmer for about 30 minutes or until lentils and veggies are tender.

Once the soup is done you can certainly eat it as is but we prefer to puree it into a smooth, thick stew. I use my immersion blender for this but you could use a blender or food processor instead. I served it garnished with a dollop of plain yogurt, a little cilantro, and a sprinkle of sunflower seeds. Pumpkin seeds, some unsweetened flaked coconut, or a dash of lime juice would work nicely as well.

Freeze leftovers in 1 cup portions using the medium/large portions method to feed your freezer stash.

NUTRITION INFO:
Per 1 cup serving - 256 Calories (118 Calories from Fat), 13g of Fat, 11g Saturated Fat, 0mg Cholesterol, 220mg Sodium, 30g Carbohydrates, 10g Dietary Fiber, 5g Sugar, 8.5g Protein, 242% DV Vitamin A, 42% DV Vitamin C, 8% DV Calcium, 19% DV Iron

** NOTE: As mentioned above, I know this seems like a LOT of fat, particularly saturated fat, but this comes from the coconut milk and is actually not a bad kind of fat. For more info check out this LINK.

Friday, February 1, 2013

Clean Eating Quick and Easy Chicken Curry

Makes 4 Servings
About a week after we arrived in Japan, Matt and I decided to be brave and try something out in town. We hired a babysitter and ventured out onto one of the main roads near our hotel. Everything was still very intimidating because we couldn't speak the language or read any signs and it all felt so alien. But, on the babysitter's suggestion, we found this little hole in the wall place called Nirvana. And inside we had hands down the absolute BEST curry I have ever had in my entire life. So good that I think about asking Matt to bring some home from work at least once every day. Dinner for two is about $30, though, so I knew I was going to have to come up with some way to satisfy my curry craving and limit myself to Nirvana only once or twice a month. This is a super fast and easy curry that you can throw together any old time. We ate it with whole grain naan but you could serve it over rice as well. 


Ingredients:
  • 1/2 Tbsp olive oil
  • 1 onion, thinly sliced
  • 1 tsp minced garlic (or 2 cloves finely chopped)
  • 1/2 tsp salt
  • 2 tsp curry powder
  • 1/2 tsp cumin
  • 1/4 tsp ginger
  • 1 cup coconut milk
  • 1 14.5oz can diced tomatoes, drained
  • 1 Tbsp tomato paste
  • 1 lb boneless, skinless chicken breast cut into bite-sized pieces
  • 3 big handfuls of spinach, torn into bite-sized pieces

ONE: In a large skillet, heat the olive oil over medium heat. Add the onion and cook for about 10 minutes, stirring occasionally, until it starts to brown. Add the garlic and salt and cook one minute, stirring frequently, until the garlic is fragrant but not burnt.

TWO: Add in the curry powder, cumin, and ginger and cook one minute, stirring frequently. Add in the coconut milk, tomatoes, and tomato paste and stir vigorously to scrape any browned bits off the bottom of the pan. Cook about 10 minutes, stirring occasionally, until thickened.

THREE: Add chicken and simmer until cooked through, about 10 minutes. Remove from heat, stir in spinach, cover, and let sit until spinach is wilted, about 3 minutes.

Freeze leftovers using the medium/large portions method to feed your freezer stash.

Nutrition Info:
Per serving- 332 Calories (173 Calories from Fat), 19g Fat, 13g Saturated Fat, 73mg Cholesterol, 429mg sodium, 14g Total Carbohydrates, 5g Dietary Fiber, 8g Sugars, 28g Protein, 54% DV VitA, 36% DV VitC, 7% DV Calcium, 17% DV Iron.

Cook onions in a bit of olive oil
Once they start to brown, add garlic and spices
Stir in coconut milk, tomatoes, and tomato paste
Add in chicken, cook through, then add spinach
:)

Sunday, January 27, 2013

Clean Eating Pumpkin Pie Baked Oatmeal

Makes 8-12 servings
Breakfast the tastes like Pumpkin Pie but is actually good for you?! Yup, instant mom of the year award right here :) In the month that it's taken me to post this recipe I've made it three times. I always give my kids a cooked breakfast and most weeks we alternate between Crockpot Overnight Oatmeal and Green Eggs but every now and again I like to throw something different into the mix. This dish smells delicious while it's cooking and really makes you feel like you are having a treat. But it's chock full of Vitamin A and whole grains making it a super way to start your day. I mix up the wet ingredients the night before to save time in the morning and then we eat the leftovers over the next few days so my little bit of effort actually yields 3 or 4 mornings of scrumptiousness. 


Ingredients:
  • 2 or 3 ripe bananas
  • 1 Tbsp honey
  • 2 cups uncooked oatmeal (I used rolled oats)
  • 1 tsp baking powder
  • 1 can pumpkin (make sure it's just pureed pumpkin with nothing random added like sweeteners)
  • 1/2 cup sucanat/honey (can use brown sugar but it won't be "clean")
  • 2 tsp cinnamon plus extra for sprinkling
  • 1 tsp nutmeg
  • 1/4 tsp ginger
  • 1/4 tsp salt
  • 2 cups milk (I used unsweetened almond milk)
  • 2 eggs
  • 1 tsp vanilla extract
  • 1 tsp almond extract
  • 1/2 cup sliced almonds, divided (I've used chopped pecans too)
ONE: Spray a 9x13 baking dish lightly with cooking spray. Thinly slice the bananas and spread them over the bottom of the dish. Drizzle with the Tbsp of honey and sprinkle with cinnamon. Place in the oven and preheat to 375. The bananas will soften while the oven heats up.

TWO: Mix the oatmeal with the baking powder and set aside.

THREE: Combine the pumpkin, sucanat, cinnamon, nutmeg, ginger, salt, milk, eggs, vanilla, almond extract and 1/4 cup of the almonds in a medium bowl. Mix well.

FOUR: Once the oven is preheated, remove the baking dish. Sprinkle the oatmeal mixture evenly over the warm bananas. Pour the pumpkin mixture evenly over the oats and top with the remaining 1/4 cup of nuts. Bake 30-35 minutes until the top is golden brown and the pumpkin mixture is firm enough that the middle doesn't jiggle if you shake the pan. You might also see the edges start to pull away from the sides of the pan. Cut into 8 or 12 servings (we eat a big breakfast so I always cut ours into 8) and serve warm.

Freeze leftovers using the flash freeze method to feed your freezer stash. Reheat in the microwave or oven.

Nutrition Info:
Per serving when made with almond milk and cut into 8 servings- 225 Calories (77 Calories from Fat), 8.5g Fat, 1.2g Saturated Fat, 41mg Cholesterol, 137mg Sodium, 34g Total Carbohydrates, 6.4g Dietary Fiber, 10.4g Sugars, 6g Protein, 195% DV VitA, 11% DV VitC, 15% DV Calcium, 14% DV Iron

Per serving when made with almond milk and cut into 12 servings- 150 Calories (51 Calories from Fat), 5.5g Fat, 0.8g Saturated Fat, 27mg Cholesterol, 93mg Sodium, 22.5g Total Carbohydrates, 4g Dietary Fiber, 7g Sugars, 4g Protein, 130% DV VitA, 7% DV VitC, 10% DV Calcium, 9% DV Iron

Spread sliced bananas in the bottom of the pan, drizzle with honey, and sprinkle with cinnamon
Roast bananas in the oven while it preheats and you combine the other ingredients
Sprinkle oatmeal mixture over bananas
Mix together pumpkin, spices, milk, eggs, 1/4 cup nuts, and sucanat 
Pour pumpkin mixture over oatmeal mixture
Sprinkle with remaining nuts
Bake 30-35 minutes until set, slice and serve
Hang out with your super cute kiddos while it's cooking :)
:)

Sunday, December 30, 2012

Clean Eating Mahi Mahi Coconut Soup

Makes 6 servings, 1 cup each
This was something I threw together when we were living in a hotel when we first arrived in Japan. I loved how easy it was and how the flavors of the ingredients really shone through. I didn't really season it at all because the ingredients I had access to were very limited, but the resulting soup was delicious so it was a blessing in disguise :)

If you are new to Clean Eating you may need to add some salt or curry powder or something. The longer you eat fresh, whole ingredients, the more your pallet adjusts to recognize the natural flavors of foods. But this takes a little while to happen so this may seem a bit bland. If you are not new to Clean Eating, you will be more than satisfied by the slight sweetness of the carrots, the tang of the lemon juice, and the creaminess of the broth. Yum!


Ingredients:
  • 1 tsp olive oil/coconut oil
  • 1 small onion, peeled and chopped 
  • 3 carrots, peeled and chopped 
  • 3/4 lb red skinned potatoes, cleaned and chopped (I used a 12oz bag of frozen mini red potatoes because that's what they had at the minimart)
  • 1 1/2 cups chicken/fish/vegetable broth
  • 1 can coconut milk
  • 2 Mahi Mahi fillets, about 4 oz each (You could use chicken breast instead)
  • 1 cup shelled edamame
  • 2 large handfuls of fresh spinach leaves
  • Lemon juice
ONE: In a large stockpot over medium high heat cook the onion, carrots, and potatoes in the olive oil until the onions are translucent and the veggies begin to soften, about 8-10 minutes.

TWO: Add the broth and coconut milk, bring to a boil. Add the fish, cover, and simmer 10 minutes or until fish is cooked through and flakes easily. Remove fish from pot and set aside.

THREE: Add the edamame and spinach to the pot and simmer for a few minutes while you cut the fish into bite sized pieces. Stir the fish back into the soup, season with a little salt to taste, and garnish with a squirt of lemon juice.

Freeze leftovers in 1 cup portions using the medium/large portions method to feed your freezer stash. Reheat in the microwave or on the stovetop.

Nutrition Info:
At first glance it may seem like this dish is high in saturated fat but it's mainly from the coconut milk which is, believe it or not, good for you. Read more about it HERE

Per 1 cup serving - 311 Calories (192 Calories from Fat), 21g Total Fat, 17g Saturated Fat, 13mg Cholesterol, 192mg Sodium, 20g Total Carbohydrates, 5g Dietary Fiber, 6g Sugars, 13.5g Protein, 121% DV VitA, 26% DV VitC, 10% DV Calcium, 16% DV Iron

Cook veggies then add in the liquid ingredients
Add in the fish and cook through
Stir in the spinach and edamame
So easy you can feed a baby while making it ;)
Multitasking is essential while living with three little kids in a hotel room.

Monday, December 3, 2012

Clean Eating Healthy Homemade Creamy Tomato Soup

Makes 6 Servings, about 1 cup each
You know when you find something that is totally awesome but so simple and it rocks your world? (Like the first time I made yogurt in the crockpot!) Well this is one of those things! This is hands down the best tomato soup I've ever had IN MY LIFE. Which is not surprising since I got it from my amazing friend, Crystal. (Hi, Crystal!) She is one of the best cooks I know and I swear if she cooked me a rubber ducky I'd eat it and it would be delicious :) Crystal is one of those cooks that just throws things together and never measures anything... ANYTHING. As you know I'm one of those cooks that measures everything. But no matter whether you are a measurer or a dumper, I promise you this will come out good. 

The original recipe called for 2 cups of milk but, here in Japan, milk is expensive and tofu is cheaper than dirt. So I used some silken tofu in place of some of the milk which actually bumped up the protein level a bit and made the soup even creamier. The boys and Matt oohed and ahhed over this and licked their bowls clean. After eating it, Matt said, "Okay, I ate it. So what's in it?" I repeatedly told him there was nothing hidden in it. Then a few minutes later I said, "Well there's tofu in it," and he said, "Oh, that doesn't count." We are now "those people" where tofu in our soup is normal. I'm okay with that. Best. Soup. EVER.


Few things are better than grilled cheese and tomato soup :)
Ingredients:
  • 1 tsp olive oil
  • 2 stalks of celery, chopped
  • 1 onion, chopped
  • 1/2 tsp salt
  • dash of peppet
  • 2 28oz cans no salt added tomatoes, undrained (diced, crushed, whatever you have)
  • 4 leaves fresh basil
  • 1 bay leaf 
  • 2 Tbsp sucanat/honey (can use sugar/brown sugar but it won't be "clean")
  • 12oz silken tofu pureed plus milk to equal 2 cups total (about 1/4 cup milk)
  • 1 tsp baking soda
ONE: Heat 1 tsp olive oil in a large saucepan over medium heat. Saute the celery and onion with the salt and pepper until the onions are translucent and the celery starts to soften, about 8 minutes.

TWO: Add in the tomatoes, basil, bay leaf, and sucanat. Bring to a boil then reduce heat and simmer, uncovered, for 45 minutes.

(At this point, Crystal removed it from the heat, blended it, strained it, and froze it in a freezer bag. On the day of serving she will defrost it and heat it in a stockpot with 2 cups milk/milk-tofu mixture and 1 tsp baking soda. I tried to blend it and strain it but it made a HUGE mess so I just removed the bay leaf and pureed it.)

THREE: Blend silken tofu until it is liquid and mix in enough milk to equal 2 cups. Stir the tofu-milk mixture into the tomato mixture and add 1 tsp baking soda. Mix well and heat through. (The baking soda seems weird but makes such a difference! It creates this light, fluffy texture and it's almost like tomato soup mousse.)

Freeze leftovers in 1 cup portions using the medium/large portions method to feed your freezer stash. Reheat in the microwave or on the stovetop.

Nutrition Info:
Per 1 cup serving - 124 Calories (21 Calories from Fat), 2.3g Total Fat, 0mg Cholesterol, 478mg Sodium, 8g Total Carbs, 0.5g Dietary Fiber, 6g Sugars, 4.5g Protein, 12% DV VitA, 9% DV VitC, 6% DV Calcium, 6% DV Iron

Saute onions and celery with salt and pepper
Add in tomatoes, basil, bay leaf, and sucanat. While I was cooking:
Theron - "What are you making mommy?"
Me - "Miss Crystal's Tomato Soup."
Theron - "Oh. You gonna take a picture." Hahaha.
Add in tofu-milk mixture and baking soda, stir well and heat through
:)

Monday, November 26, 2012

Clean Eating Healthy Homemade Hamburger Helper

Makes about 7 servings, 1 1/4 cups each
This one earned me super-duper-awesome-wife brownie points for sure! Matt LOVES Hamburger Helper. Back when we actually ate it, we would always joke that I could cook for hours and he would like it but if I made Hamburger Helper he would rave about it for weeks. He's a pretty laid back guy and has willingly joined me on our Clean Eating journey (alright, he's way too lazy to cook something for himself so he just sucks it up and eats what I make but "willingly" sounded so much nicer). For every blog-worthy thing I make you can pretty much guarantee he's had to choke down two things that were not blog-worthy. He never complains while he's eating it and then at some point later that night or the next day, he will just casually say he wouldn't mind if we didn't have it again. But the one thing I know he really, really misses from our pre-Clean Eating days is Hamburger Helper. And do you want to know a dirty little secret? I do too!!

Don't get me wrong, I would never actually cook Hamburger Helper now because of the white pasta, msg, hfcs, preservatives, additives, and laundry list of chemicals they manage to squeeze into that brightly colored little box. But I used to make it about once a week when we were first married and I miss how easy and fast it was. Plus you can't beat the fact that it only dirties one pan (especially since we have no dishwasher yet in our Japanese house).

My totally awesome new friend, Christine, (hi, Christine!) watched the kids for me today while I went to the dentist so naturally I stayed and hung out (okay hid from the unpacking I was supposed to be doing) for like 4 hours afterwards drinking cup after cup of tea and cuddling the baby. Once we finally got home it was already dinner time and I hadn't planned anything. I am working on building my freezer stockpile right now since we had to empty the freezer when we moved so I wanted to whip something up fast instead of using my little stash. And all I could think was, "I wish there was a healthy version of Hamburger Helper." Well now there is. The whole family loved this and Matt agreed that it was just as good as real Hamburger Helper. Which could be read as "you cook as well as crap that you dump out of a box" but I know coming from him it's a huge compliment LOL. Super fast, super easy, and only one pan to clean. Woo hoo!


This picture does NOT do it justice. It was so delicious that we all scarfed it down and I completely forgot to take a picture when it was hot so this serving has actually been sitting in the fridge for a few hours LOL. I'm writing this at 12:30 AM and it took a RIDICULOUS amount of willpower not to eat this serving cold after I took the pic. 
How I "healthified" it:

  • Substituted whole wheat pasta for the white pasta.
  • Used real cheese, real tomatoes, and seasonings instead of a packet of mystery chemical powders.
  • Used lean ground turkey instead of ground beef.
  • Added broccoli (cut up REALLY small so that you barely notice it... and it's harder to pick out).

Ingredients: 

  • 1.25 lbs 93% lean ground turkey (my package was 1.25 lbs but 1 lb would be fine)
  • 3 cups broccoli, chopped into little pieces 
  • 1/4 tsp black pepper 
  • 1 1/2 tsp onion powder 
  • 1/2 tsp garlic powder 
  • 15 oz can tomato sauce 
  • can full of water 
  • 2 tsp yellow mustard (I didn't have any so I used 1 tsp mustard powder and 1 tsp vinegar
  • scant 1/2 tsp salt 
  • 2 1/2 cups whole wheat pasta (I used elbow macaroni
  • 1 cup shredded sharp cheddar cheese 
ONE: In a large skillet, brown the ground turkey over medium high heat until no longer pink. Drain off grease and rinse out pan.

TWO: Return browned turkey to skillet and add broccoli, pepper, onion powder, garlic powder, tomato sauce, a can full of water, mustard, salt, and pasta. Stir well. Bring to a boil then reduce heat; cover and simmer 12-15 minutes, stirring occasionally, until the water is absorbed and the pasta is cooked. (If you plan on freezing the leftovers, slightly firmer pasta is better)

THREE: Turn the heat off and stir in the cheese.

Freeze leftovers in 1 1/4 cup portions using the medium/large portions method to feed your freezer stash.

Nutrition Info:
Per 1 1/4 cup serving - 339 Calories (106 Calories from Fat), 11.7 g Total Fat, 5.3g Saturated Fat, 74mg Cholesterol, 681mg Sodium, 35g Total Carbs, 5g Dietary Fiber, 3.5g Sugars, 26.7g Protein, 14% DV Vit A, 63% DV Vit C, 17% DV Calcium, 20% DV Iron

Brown ground turkey
Dump in everything else, bring to boil, simmer 15 mins on low, remove from heat and stir in cheese
Matt insisted on eating his with chopsticks. He's a weirdo but we love him anyway :)
Admit it, you would rather spend your day cuddling this cutie than unpacking too :)
:)

Thursday, November 22, 2012

Clean Eating Turkey Chili

Makes about 16 servings, 1 cup each 
This is sooooo easy to make, is delicious, and is a great way to sneak a whole bunch of veggies into your family without them knowing it. Perfect paired with some whole grain cornbread. This is one of the very first recipes I started making when I was getting into freezer cooking. You could pretty much guarantee that you would always be able to find at least one serving in the freezer. So naturally when we arrived in our house in Japan and I had a big, huge, empty freezer to fill I thought the first thing in there should be a big batch of chili. But for some reason I have never posted the recipe and my recipe box had yet to be unearthed in our pile of boxes. As you know I am incapable of cooking ANYTHING without a recipe so I literally sat on a stool in my kitchen surrounded by boxes and went through 3 years (three years!!!!) of e-mails (on my phone because our internet wasn't set up yet) until I found an old one where I had sent the recipe to my friend. Crazy, right?! This chili is so good it was worth it :)


Ingredients:

  • 2 medium onions, minced 
  • 4 medium carrots, chopped 
  • 1 medium bell pepper, stemmed, seeded, and cut into ½-inch pieces 
  • 6 medium garlic cloves, minced (2 Tbsp) 
  • ¼ cup chili powder 
  • 1 Tbsp ground cumin 
  • 1 tsp dried oregano 
  • 1 Tbsp olive oil 
  • 1 ½ tsp salt, divided 
  • 2 lbs 93 percent lean ground turkey 
  • 2 15oz cans red kidney beans, drained and rinsed (or sometimes I use Cannellini beans)
  • 1 14.5oz can diced tomatoes 
  • 1 15oz can tomato sauce 
  • 1 28oz can crushed tomatoes 
  • 2 cups low-sodium chicken broth 
  • 1 bag fresh spinach 
Optional: (if you like it hot. You know me, I'm super wimpy so I leave these out!)

  • ½-1 tsp red pepper flakes 
  • ¼ - ½ tsp cayenne 
Slow Cooker Directions: Brown the ground turkey and toss it in the crockpot with all the other ingredients except the spinach (you can omit the Tbsp of olive oil). Cover and cook on high 4-6 hours or on low 8-10 hours. An hour before serving, stir in the bag of spinach, cover, and continue cooking. 

Stove Top Directions: 
ONE: Combine the onions, carrots, bell peppers, garlic, chili powder, cumin, oregano, oil, ½ tsp salt, red pepper flakes (if using), and cayenne (if using) in a large covered pot. Cover and cook over medium-low heat, stirring often, until the vegetables are softened, 8-10 minutes.
TWO: Increase the heat to medium-high, add the turkey, and cook, breaking up the meat with a wooden spoon, until no longer pink and just beginning to brown, about 4 minutes.
THREE: Stir in the beans, diced tomatoes with their juices, crushed tomatoes, broth, and 1 tsp salt. Bring to a boil over medium-high heat; reduce the heat to medium-low, stir in the spinach, and simmer, uncovered, until the chili has begun to thicken, about 1 hour.

Freeze leftovers in 1 cup servings using the medium/large portions method to feed your freezer stash. Reheat in the microwave or on the stove top.

Nutrition Info: 
Per 1 cup serving - 217 Calories (48 Calories from Fat), 5g Total Fat, 1.5g Saturated Fat, 40mg Cholesterol, 693mg Sodium, 27g Total Carbs, 8g Dietary Fiber, 3g Sugars, 18.5g Protein, 135% DV Vit A, 63% DV Vit C, 13% DV Calcium, 31% DV Iron

I only used two carrots because look how huge my Japanese carrots are!!
Dump in the veggies

Dump in the meat, cans, and seasonings... also a good shot of my cookbooks in case you were interested. Super Baby Food was where it all started, then there is my Eat Clean Diet Book (which should really be called the non-diet book since it's not a diet, it's a lifestyle), every Clean Eating Magazine ever published, and Cook's Illustrated Best Light Recipe. Who could need anything more?!
Stir and cook. So easy :)

:)

Clean Eating Whole Grain Cornbread

Makes 16 servings, one slice each 
This is probably one of my boys top 5 favorite things and mine too. Every time I run the breadmaker, they run in as soon as they hear it start and ask if I'm making cornbread. If the answer is yes, there will be much cheering and happy dancing in the Allan household :) If you were previously a box of jiffy cornbread kind of person then this will be a little drier and more crumbly than what you are used to (likely due to the lack of shortening lol) but it is full of flavor and way better for you. Because it is a little crumblier, I like to cut the entire loaf in half and then cut fat slices instead of thin slices. You'll see what I mean in the pic. We almost always make this to eat with Turkey Chili. I've also used it to make cornbread stuffing.


Hot and fresh from the mini loaf pan! You can almost smell it :)
Ingredients: 
  • 1 ½ cups whole grain cornmeal (the side of the package must say whole grain corn or whole ground corn or something involving whole, not degerminated or anything. I buy mine at the natural food store in bulk.
  • 1 ½ cups whole wheat flour (I use King Arthur's White Whole Wheat)
  • 2 ½ tsp baking powder 
  • 1 tsp salt 
  • 3 Tbsp honey 
  • 1 ½ cups buttermilk (I NEVER have this so I combine 1 ½ c milk w/ 1 ½ Tbsp lemon juice, let sit 5 minutes then stir
  • ¼ cup oil (extra virgin olive oil, coconut oil, whatever you like
  • 2 eggs, beaten 
  • Optional: For sweet cornbread add ½ cup Sucanat or honey (I always do
Breadmaker Instructions: Dump all the liquid ingredients into the pan and then add the dry ingredients. Set the machine to the quickbread setting and push start.

(NOTE: Not all machines have a quickbread setting. This is not the rapid setting for yeast breads, it's a specific setting for quickbreads using baking soda/powder instead of yeast. If your machine doesn't have this setting, mix the ingredients first then dump them in and just run it on the bake setting for about an hour.)

Oven Instructions:
ONE: Buy a cheap used breadmaker on Craigslist. Just kidding... kind of. Preheat oven to 400 (350 if using mini loaf pan or 9" loaf pan). Coat an 8” square pan, 9" loaf pan, or mini loaf pan with non-stick spray.

TWO: Mix flours, baking powder, salt, honey, and sucanat/extra honey (if using) with a wire whisk. In a separate bowl combine wet ingredients and then stir into dry ingredients just until moistened.

THREE: Pour batter into a prepared pan and bake 20-25 minutes for square pan or mini loaf pan or 30 minutes for a 9" loaf pan or until the top is golden brown and a toothpick inserted into the center comes out clean.

Crockpot Instructions:
ONE: Mix all ingredients as directed in oven instructions. Coat the inside of the crock with cooking spray, dump the batter in, and put the lid on.

TWO: Cook on high for 3-4 hours or until a toothpick comes out clean. If you notice a lot of condensation building up inside the cover, prop it open with a chopstick or similar sized item to vent.

Cut into 16 slices. Freeze leftovers using the flash freeze method or double bagged method to feed your freezer stash. Reheat in the microwave or toaster or thaw in the fridge overnight.

Nutrition Info:
Per slice (sweetened version using sucanat) - 162 Calories (38 Calories from Fat), 4g Fat, 0.7g Saturated Fat, 21mg Cholesterol, 170mg Sodium, 28.7g Total Carbs, 1.2g Dietary Fiber, 10.6g Sugars, 3.6g Protein, 2% DV Vit A, 1% DV Vit C, 7% DV Calcium, 6% DV Iron

Per slice unsweetened - 140 Calories (38 Calories from Fat), 4g Fat, 0.7g Saturated Fat, 21mg Cholesterol, 170mg Sodium, 22.7g Total Carbs, 1.2g Dietary Fiber, 4.6g Sugars, 3.6g Protein, 2% DV Vit A, 1% DV Vit C, 7% DV Calcium, 6% DV Iron

Dump in the liquids
Dump in the dry ingredients
Press start and it magically becomes bread :) I love my breadmaker! This pic also shows what I mean about cutting the loaf down the middle to make short, fat slices instead of wide, skinny slices.
For non-breadmaker, mix together the dry ingredients
Stir in the liquid ingredients. Dump in a pan or crockpot and bake.
I had chili in the crockpot and cornbread in the breadmaker so, instead of spending time in the kitchen, I got to hang out with this little cutie pie :) Life is good.

:)

Wednesday, November 21, 2012

Clean Eating Shrimp and Veggie Saute (or Clean Eating Shrimp and Grits)

Makes 6 serving, about 3/4 cups each
This is tasty and quick to throw together. We have only ever eaten it served on top of Cheese Grits which takes it from being pretty good to being holy-cow-I-love-this-dinner good. You could definitely sub chicken for shrimp (Anthea, I know you will!) and it is still delicious. You could also change around the veggies depending on what you have available. 


Ingredients:
  • 1 lb medium shrimp, peeled and deveined, tail off (or 1 lb chicken cut into bit sized pieces)
  • 1 tsp chili powder
  • sea salt and black pepper
  • 2 Tbsp olive oil, divided
  • 2 small zucchini, quartered lengthwise and cut into 1/2-inch pieces
  • 1/2 red onion, chopped
  • 1 1/2 tsp minced garlic (or 3 cloves finely chopped)
  • 14.5 oz can no-salt-added diced tomatoes, undrained (or 1 1/2 cups chopped tomatoes)
  • 4 or 5 leaves of fresh basil or 1/2 Tbsp dried
ONE: Season shrimp with chile powder, salt, and pepper. Heat 2 tsp oil in a large skillet over medium-high heat. When the oil is hot add half of the shrimp. Cook 2 minutes without stirring or until browned on the bottom. Flip them over and brown the other side, about 2 more minutes. Transfer to a plate and repeat with another 2 tsp oil and the rest of the shrimp. (It takes a little longer to cook them in two batches but not crowding the pan will give them space to brown instead of just steaming.)

TWO: Pour the remaining 2 tsp oil into the same skillet and return to medium-high heat. Add the zucchini and onion, 1/4 tsp salt, and a sprinkle of pepper, and cook until softened and lightly browned, about 8-10 minutes.

THREE: Add garlic and cook for one minute, stirring constantly.

FOUR: Add tomatoes and their juice and cook until mixture thickens slightly, about 5 minutes.

FIVE: Add shrimp with any juices that have accumulated on the plate and stir just until heated through. Remove from heat and stir in basil.

As I said above, I always serve this over hot Cheese Grits but you could certainly serve it over brown rice of whole wheat pasta as well. Freeze leftovers in 3/4 cup portions using the medium/large portions method to feed your freezer stash. I actually scoop leftovers of the grits into a container and then smush a serving of the shrimp and veggies into the top of it and freeze them both together.

Nutrition Info:
Per 3/4 cup serving made with shrimp - 139 Calories (51 Calories from Fat), 5.7g Total Fat, .7g Saturated Fat, 149mg Cholesterol, 314mg Sodium, 6g Total Carbs, 2g Dietary Fiber, 3g Sugars, 17.5g Protein, 10% DV Vit A, 22% DV Vit C, 4% DV Calcium, 16% DV Iron

Per 3/4 cup serving made with chicken - 211 Calories (94 Calories from Fat), 10g Total Fat, 2g Saturated Fat, 67mg Cholesterol, 208mg Sodium, 6g Total Carbs, 2g Dietary Fiber, 3g Sugars, 23g Protein, 11% DV Vit A, 22% DV Vit C, 3% DV Calcium, 8% DV Iron

Browning the shrimp
Cooking Zucchini and Onions
Cooking down the tomatoes
:)